
User Management
A platform account is what lets someone log in. This page covers the four roles, changing a role and removing an account, the teams that set what an internal user can reach, how to invite someone by email or by link, and what to do when an invitation does not arrive.
This page is for wholesalers.
A platform account is what lets a person sign in. Everything else about a customer, including their whole trading history, exists whether or not anyone on their side has ever logged in.
Customer Records and Accounts
- A customer record is your own note of an account you sell to. You create it, you maintain it, and the customer never touches it. See Customers.
- A platform account is a login. It belongs to a person, and it is what puts the design tool and their own quotes in front of them.
A customer record with no account behind it is the normal starting state, and plenty of accounts never move past it. That is what quoting on a customer's behalf is for.
The Users Page
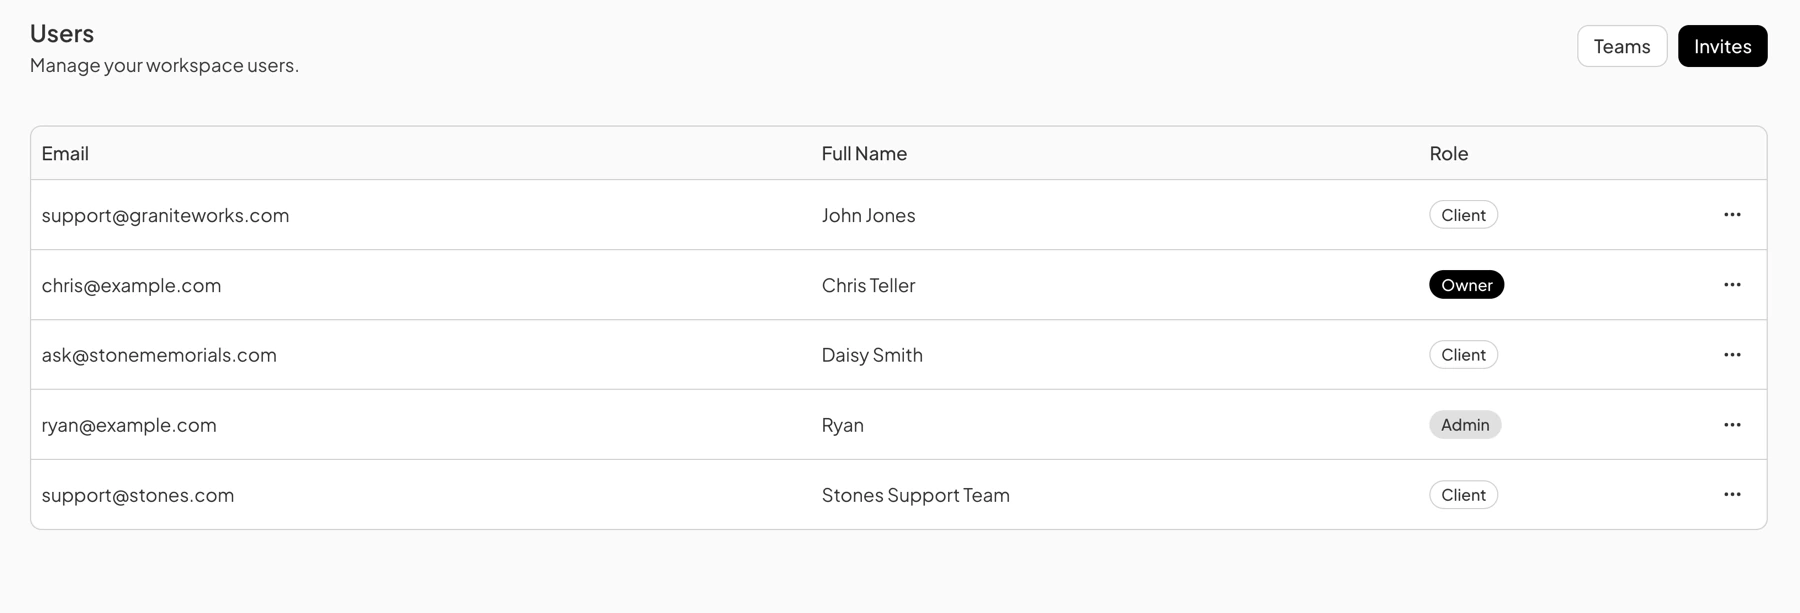
Users lists everyone with an account on your workspace, by email, full name, and role. Your own staff and your customers appear on the same list, separated by the role badge.
Teams and Invites at the top right open the two panels behind it: the teams that set what internal users can reach, and the invitations that have been issued.
Roles
Every account carries exactly one of four roles.
- Owner. The account the workspace belongs to. Deleting the workspace and managing billing are the two things only an owner can do. The role can be transferred to someone else.
- Admin. Full access to every workspace feature except deleting the workspace and managing billing. This is the role for staff who need broad permissions.
- Client. An external user, which in practice means your customers. A client can create designs and request quotes, and sees nothing belonging to anyone else.
- Custom. An internal team member whose permissions come from the team they are assigned to. This is how you give someone on your own staff part of the product rather than all of it.
Changing or Removing a User
Opening a user from the Users list gives the actions available on that account.
- Change their role. An account can be moved between roles, which is how somebody who started as a custom user on one team becomes an admin, or the other way around.
- Transfer ownership. The owner role moves to the user you choose. This is the only way ownership can change hands.
- Remove them. The user immediately loses access to your workspace. Removing a client user does not delete their customer profile.
Teams and Permissions
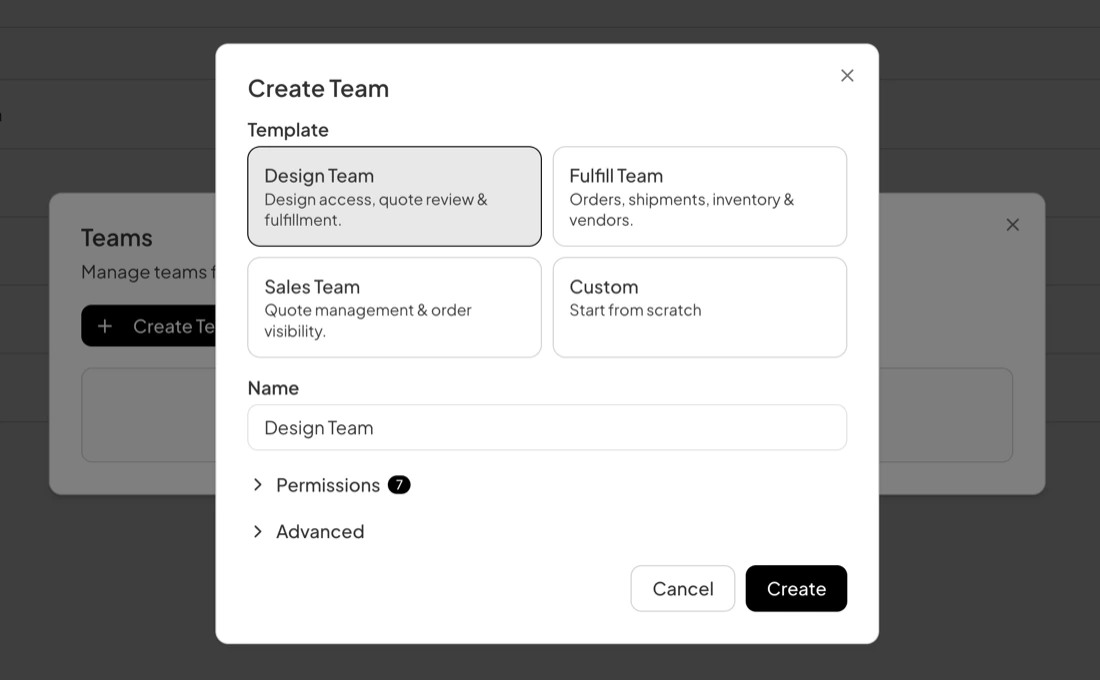
A team is a named set of permissions. A custom user is assigned to one and receives that team's permissions.
Create Team opens on four templates. Design Team covers design access, quote review, and fulfillment. Fulfill Team covers orders, shipments, inventory, and vendors. Sales Team covers quote management and order visibility. Custom starts from scratch.
A template is a starting point rather than a fixed set. Choosing one fills in the name and selects a group of permissions, and both can be changed before the team is created.
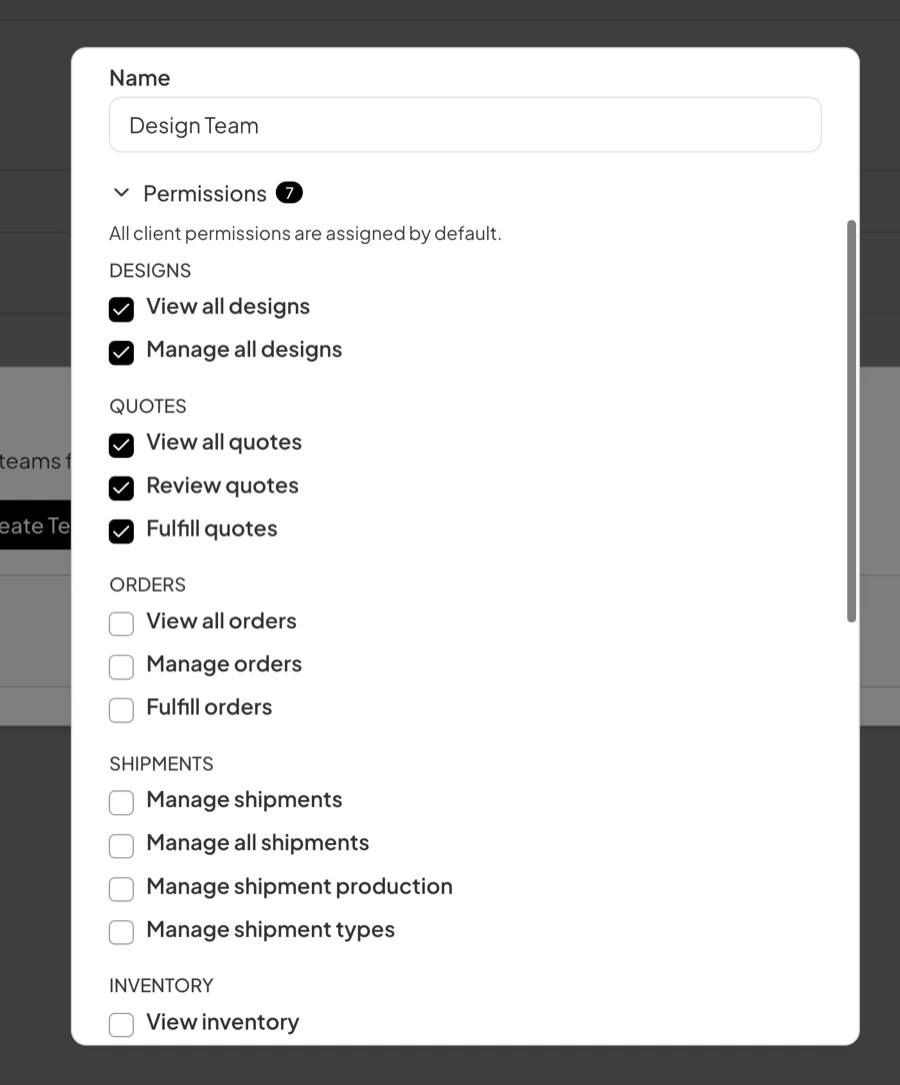
Expanding Permissions shows the full list, grouped by the part of the product each one covers: designs, quotes, orders, shipments, inventory, and the rest. Within a group they separate viewing from acting, so a team can be given View all orders without Manage orders.
Inviting Someone
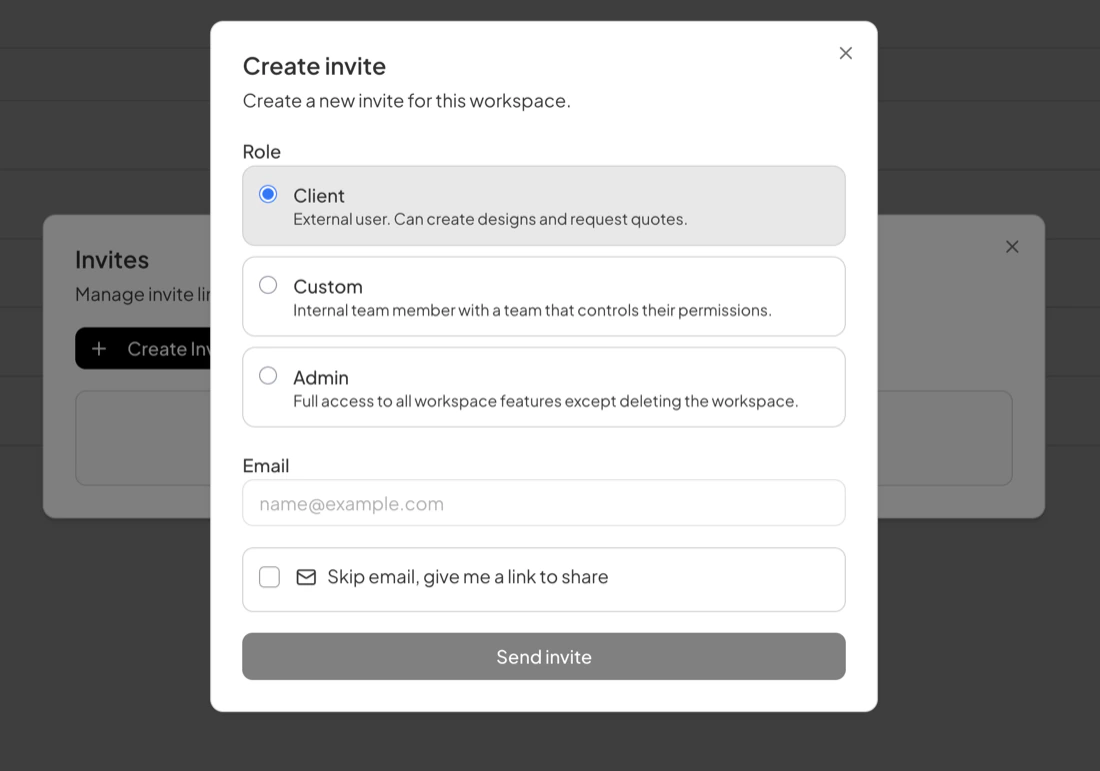
- On the Users page, open Invites, then Create Invite.
- Choose the Role. Client, Custom, and Admin are the available options.
- Enter their Email to have the invitation sent there. To pass the link on yourself instead, check Skip email, give me a link to share.
- Click Send invite.
If an Invite Does Not Arrive
An emailed invitation should reach the recipient within 15 minutes. If it has not, work through this before assuming it failed.
- Have them check their spam or junk folder.
- Ask whether their mail runs through a firewall or a quarantine. This is common on business accounts, and it is where invitations most often stop. An administrator on their side can release it.
- Issue the invitation again with Skip email, give me a link to share, and send the link by whatever route you already use to reach them.
If none of that produces the invitation, contact Stonegate support at support@stonegatescribe.com.
Giving a Customer Access
A customer can also be brought in from their own record, which is the shorter route when the record already exists. The Platform Account card on the customer's detail page has two controls:
- Create Invite where the person has no account yet.
- Link User where the account already exists, which is the case when someone was set up under a different record or is being moved onto this one.
Either way the customer ends up with a client account. The record and the account remain separate things, and linking is what associates them.
What a Client Account Can Do
Once a customer is linked, they can:
- Sign in to your white labeled workspace.
- Build designs in the design tool, priced from your catalog as they go.
- Submit those designs to you as quotes.
- Review and approve the quotes you send back, or request changes.
- Follow their orders, including the estimated dates on them.
Everything on that list is work that otherwise arrives by phone or email and gets keyed in by somebody on your side. That is the practical argument for linking an account rather than leaving a customer on the books unlinked.
Next Step
A linked customer's first move is usually to build something. The design tool they land in is covered in Creating a Design.
Last updated August 1, 2026
Still need help?
If this page did not answer your question, email our support team and include your account name and what you were trying to do.