
Customers
Customers is your own list of everyone you sell to, and every design, quote, and order is raised against one of them. This page covers what a customer record holds, how to create one, the trading history it accumulates, and how linking a customer to a platform account lets them log in.
This page is for wholesalers.
Customers is your own list of everyone you sell to. Every design, quote, and order is raised against a record on it, so the record has to exist before there is anything to raise.
What a Customer Is
A customer is an account you sell to. Many are monument retailers, but the list holds whoever you actually invoice: other wholesalers, cemeteries, funeral homes, and individuals sit on it.
The list is internal. A customer record is something you keep about an account rather than something the customer holds or maintains, and most of what is on it is never seen by them. Giving someone a login is a separate step, covered under User Management.
The Customer List
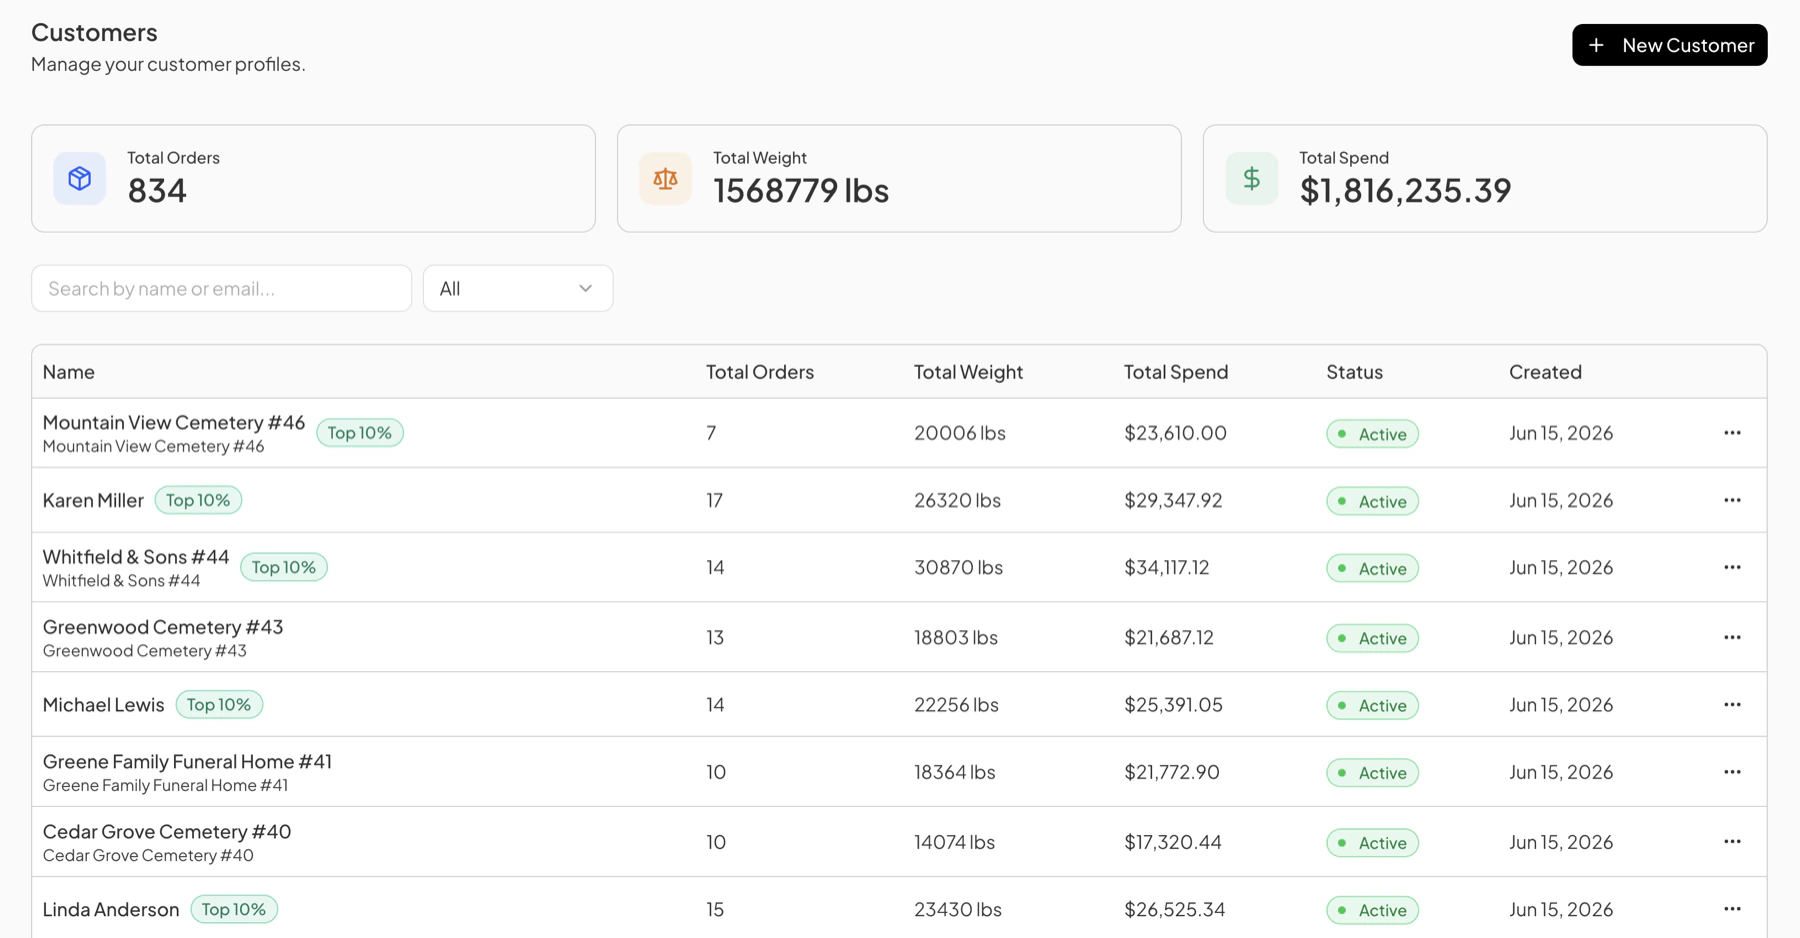
Three figures across the top total your whole book: orders placed, the weight behind them, and what has been spent with you. The table below breaks the same three down per customer, alongside the account status and the date the record was created.
A Top 10% badge marks your highest-spending accounts. Search matches on name or email, and the dropdown beside it filters the list by status.
Creating a Customer
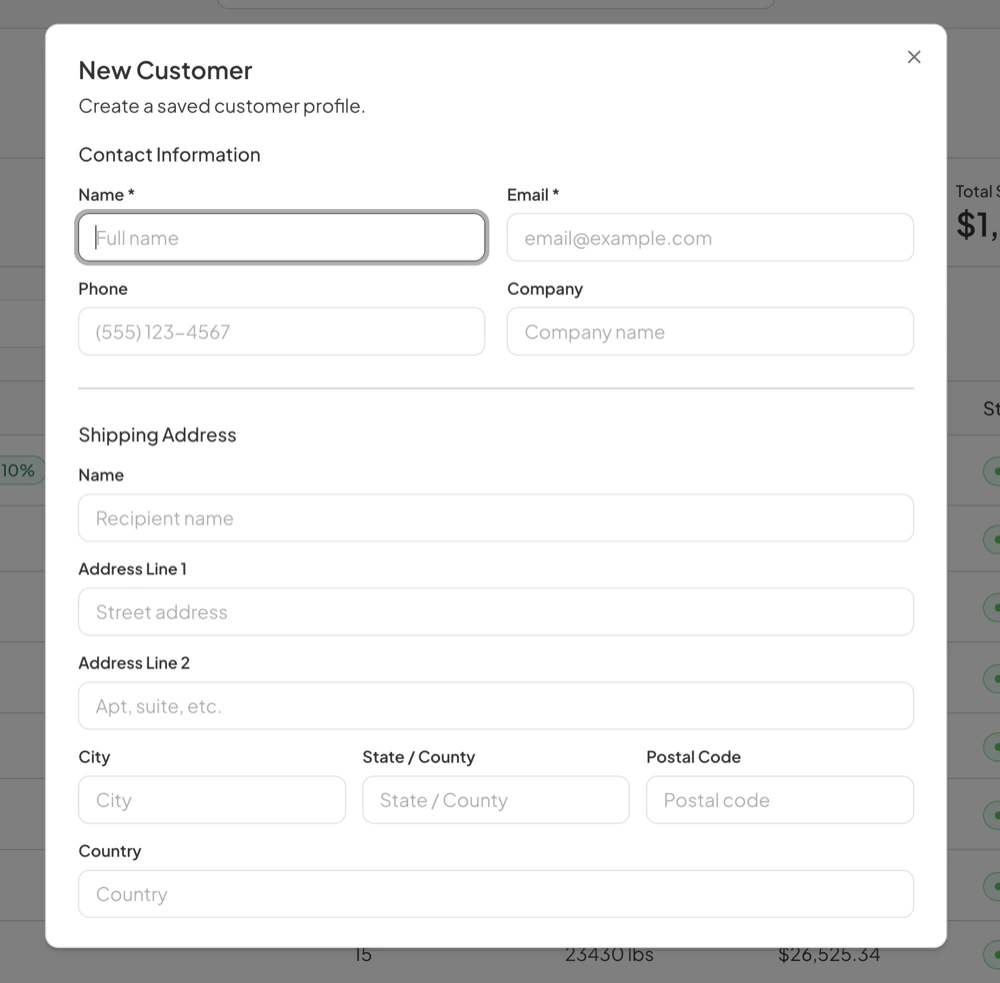
- On the Customers page, click New Customer at the top right.
- Fill in Contact Information. Name and Email are the only required fields. Phone and Company are optional.
- Add the Shipping Address. The Name here is the recipient at the far end, which is not always the same as the account name.
- Save the profile.
Filling in Company is worth the extra second on a business account. Where the name and the company differ, the list shows both, which is what separates two contacts at the same firm or two firms with a similar name.
The Customer Record
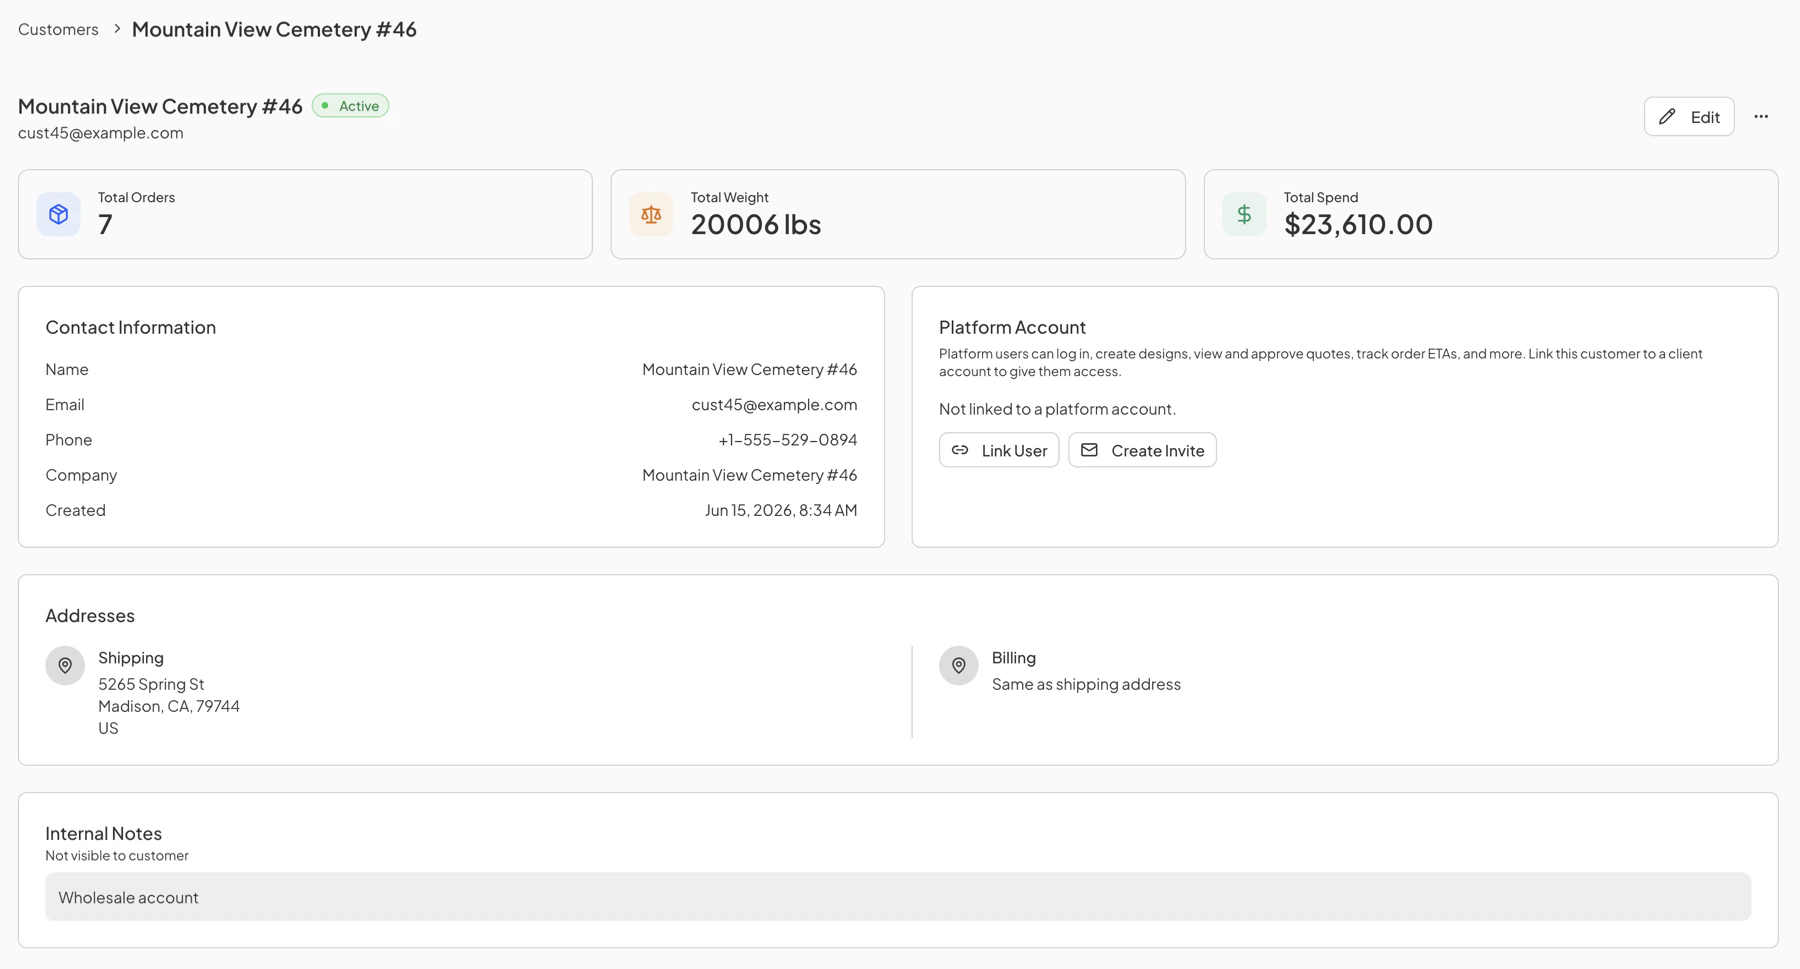
Opening a customer shows the same three totals scoped to that account, above a set of cards.
- Contact Information. Name, email, phone, company, and when the record was created.
- Platform Account. Whether this customer can log in, and the controls to give them access.
- Addresses. Shipping and billing. Billing reads Same as shipping address unless a separate one has been entered.
- Internal Notes. Marked Not visible to customer. Account terms, standing instructions, and anything else you want on record about this account belong here.
Edit at the top right reopens the same fields the record was created with.
Giving a Customer a Login
Linking a customer record to a platform account allows the customer to log in, build designs, see and approve their own quotes, and follow the estimated dates on their orders. The Platform Account card offers two routes:
- Link User connects the customer to an account that already exists.
- Create Invite sends an invitation so they can set one up.
Both are covered in User Management, along with the account types and what each one can reach.
Quotes and Orders for a Customer
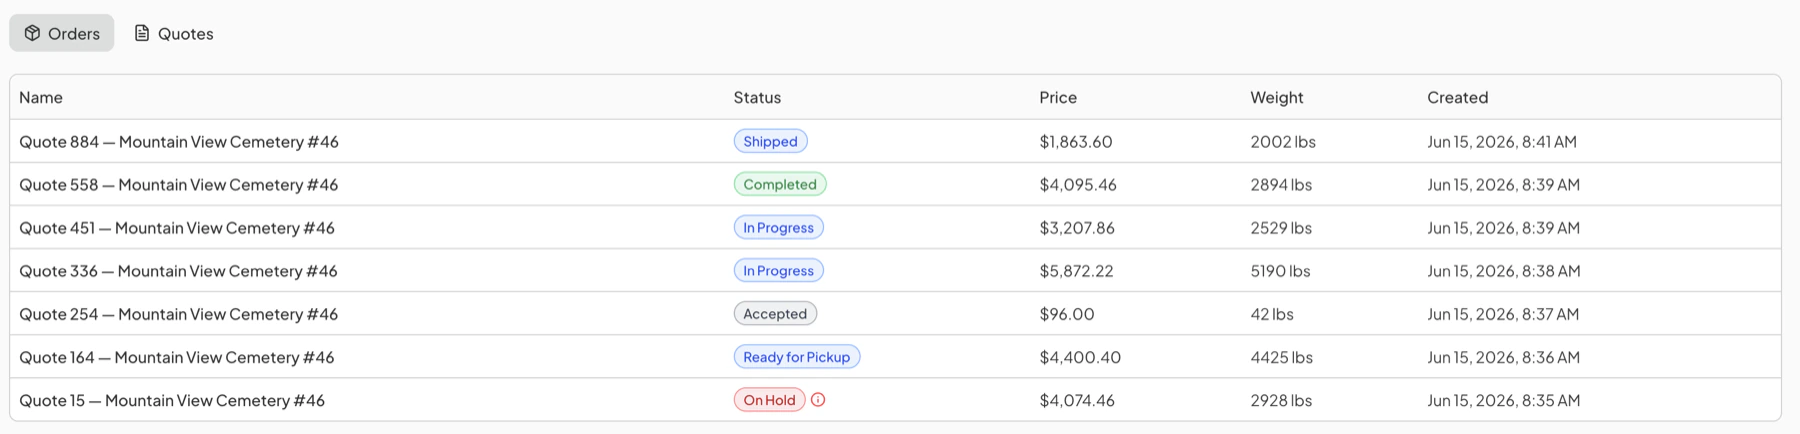
Below the customer details, the Orders and Quotes tabs list everything raised against this account, each row carrying its status, price, weight, and the date it was created.
This is the fastest way to answer what is currently open for a customer who has called to ask.
Why a Customer Comes First
A quote belongs to a customer from the moment it exists. On a manual quote the Customer field is required before the quote can be created. On a quote built from a design, the customer is either the one who submitted the design or the one you select when you build the design for them.
Neither kind can be raised against a customer who is not on file yet, so creating the record is the first thing that happens when new business comes in.
Next Step
With a customer on file, a quote can be raised for them from a design or by hand. Those are covered in Creating a Quote From a Design and Creating a Manual Quote.
Last updated August 1, 2026
Still need help?
If this page did not answer your question, email our support team and include your account name and what you were trying to do.